One of the most important skills of roman architects was the ability to build roads. Roads were important military facilities that allowed roman legions to reach every region of the Empire. At its greatest extent, the road network of the Roman Empire measured 8.000 km divided into 29 main roads that started from Rome towards all territories of the Empire. This network was so important that survived to the fall of the Roman Empire, it was used from Late Antiquity through the Midde Age till today. Several modern roads follow the ancient paths. Along this network of roads Rome did transport its legions, its politic, its authority.
The texture
A typical roman texture of basolato presents large polygonal tiles of basalt whose borders are perfectly mutually aligned. The design is so typical that the less flaw in the texture can spoil the effect.
I was unable to find a decent texture of a basolato for longtime. I have tried the following techniques with poor results :
| Terchnique | Issue |
| Procedural texture | The shape of the computer generated polygons are not similar to the shape of the roman tiles. |
| Hand-made drawing scan | Colors of the basalt did not match. Seamless texture difficult to conceive. |
| Real photos | Almost impossible to produce a seamless texture from a picture. Photos with ‘good’ texture of basolato (orthogonal view of the road) are rather rare. |
After having tried several techniques to generate a decent texture, I have decided to use Lightwave to built a section of a road using stones meshes to which I have applied high resolution basalt texture found on the net. The technique to make a seamless texture with Lightwave is not very difficult if you apply the ‘concept’ of seamless textures to meshes. Here the technique I have used to generate a good quality texture of a roman road:
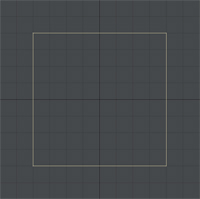 |
In lightwave, draw a square at the origin. The size of my square is 4×4 meters | |
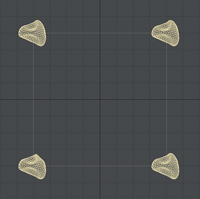 |
Model a stone and place a copy of it at every corner of the square. Ensure that the corners of the square are exactly at the same position in the stones. | |
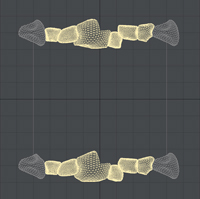 |
Model some stone and align them at the upper side of the square. Copy them at the oppposite side, ensuring that the line of the background square drops exactly at the same points in the two arrays. | |
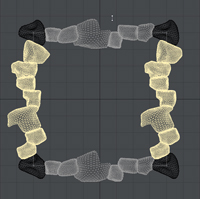 |
Do the same for the vertical sides of the square. | |
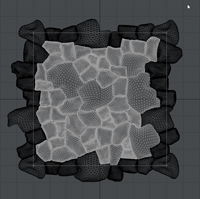 |
Model different stones and arrange them in the inner area. Try to model them in such manner they have roughly the same size and shape. If you put a shape that can be easily identified, you can end up with a repetitive pattern flaw in the seamless texture. | |
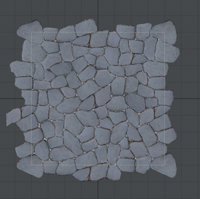 |
UV texture the differrent stones with a picture of basalt. I have used different sources to texture the stones. | |
 |
Fill the intersections of the stones, add some dirt and dust to the tiles, cut the edges around the original square and correct possible flaw ad the edges. you have a perfectly photorealistic seamless texture. |
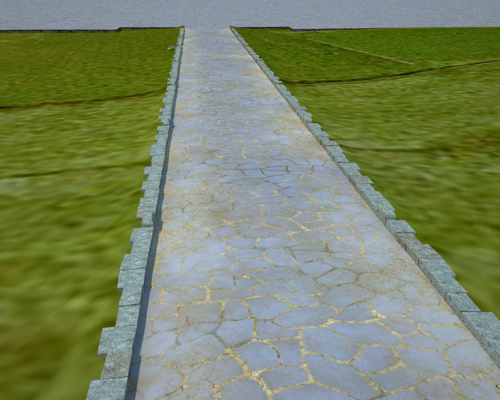
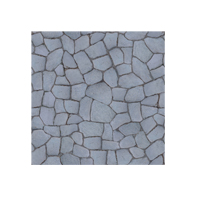
The road texture in action
With the use of some smart layer of procedural textures for dust and dirt on top of the road texture it is not possible to identify repetitive patterns on the road and the final effect is rather satisfactory.